[ NARRATOR SHOWING THE APP MAIN VIEW, NO FILTERS ARE SET ]
- Hi, my name is [Narrator tells his name] and today I’m gonna show you how you can export product data on Shopify store using the “ Excel Like Product Bulk Edit ” application.
- Excel Like Product Bulk Edit is a robust application with many options and among them it is an excellent export/import data tool.
- One of great things about this app is that it exports what you have filtered in the main view, and the filtering capabilities of this app are very powerful. Also export will respect the active sorting of the main data-grid. So, the task to export some set of needed data is very easy to do. All you have to do is to set the right filters, filter and then export.
- One very good thing about full export is that it is sort of a backup for your data. If you have full export you can completely recover your catalog. Images are stored as urls but Shopify can return you your past/deleted images on demand.
- For the first go I will not use filters I will just export everything. Export dialog is accessed from Options->Export. [NARRATOR OPENS EXPORT DIALOG] Initially dialog will show us basic options.
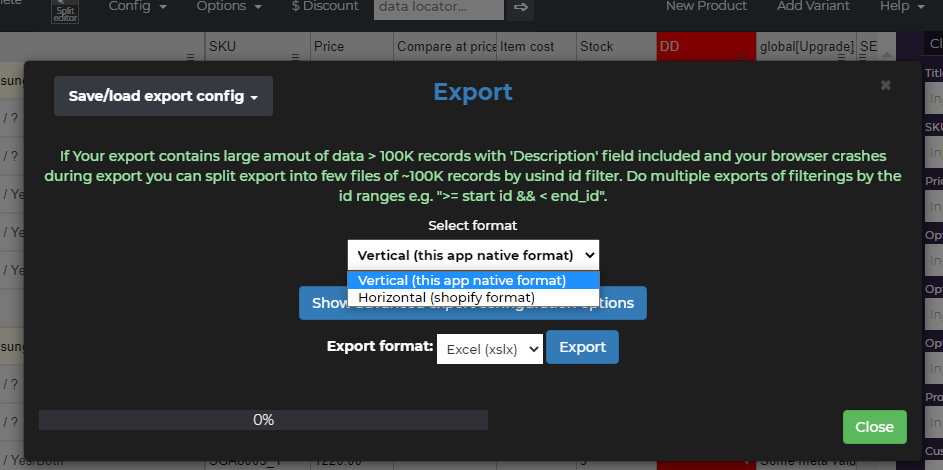
We have an option of selecting a format of data which can be like the default view of an app called “Vertical” or it can be like Shopify default import/export format called “Horizontal”.
Vertical format exports row for product and below it rows for its variants.
Horizontal format has only rows for variants and product properties are contained inside variant rows.
So in case we would want to export only variants we would use Horizontal format. If we would want to export only products without variants we would use Vertical format and the filter called “Only products”.
We can also select the format of the output file. It can be CSV or XLSX. XLSX is certainly a better option for a lot of data especially if it contains HTML content fields.
If we toggle Advanced options we will get a list of all available columns. We can sort their order by dragging the sort handle. We can rename their headers if we want to. [NARRATOR TOGGLES (opens) Advanced export options]
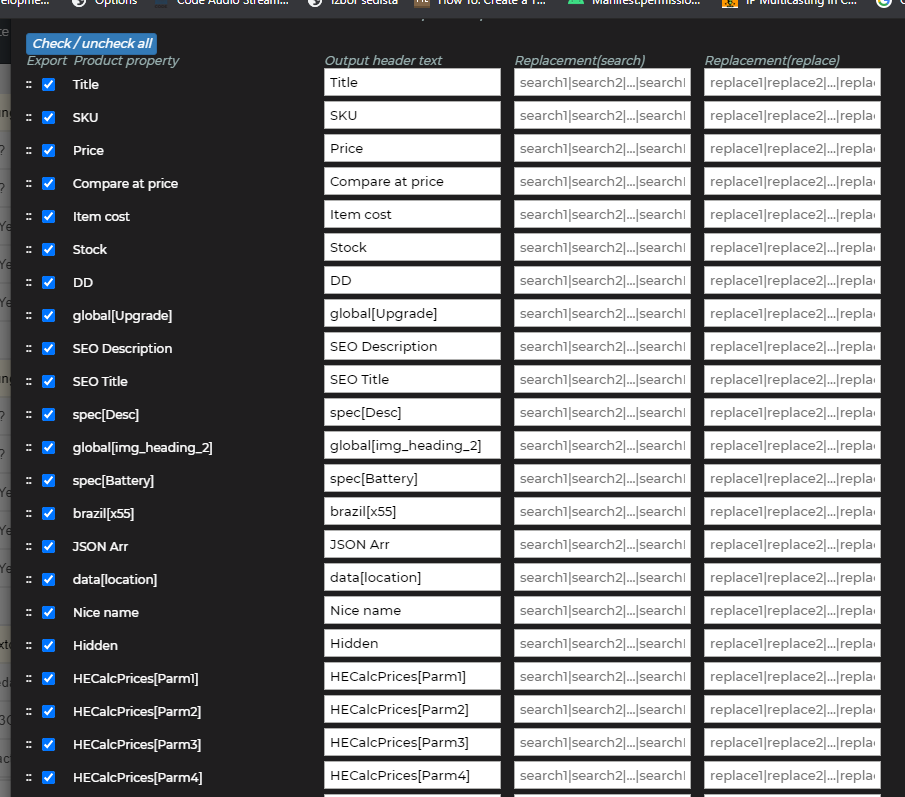
We can also replace output text in cells by using search replace options.
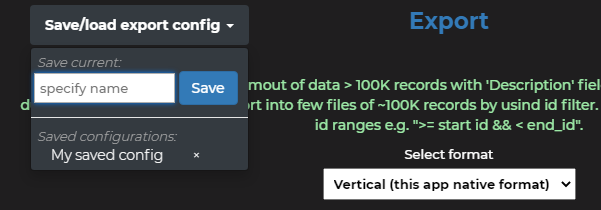
You might have a lot of configuration here so there is even an option to save your configuration in order of reusing it later [NARRATOR shows (spens) save.load export config drop-down in top-left part of dialog] .
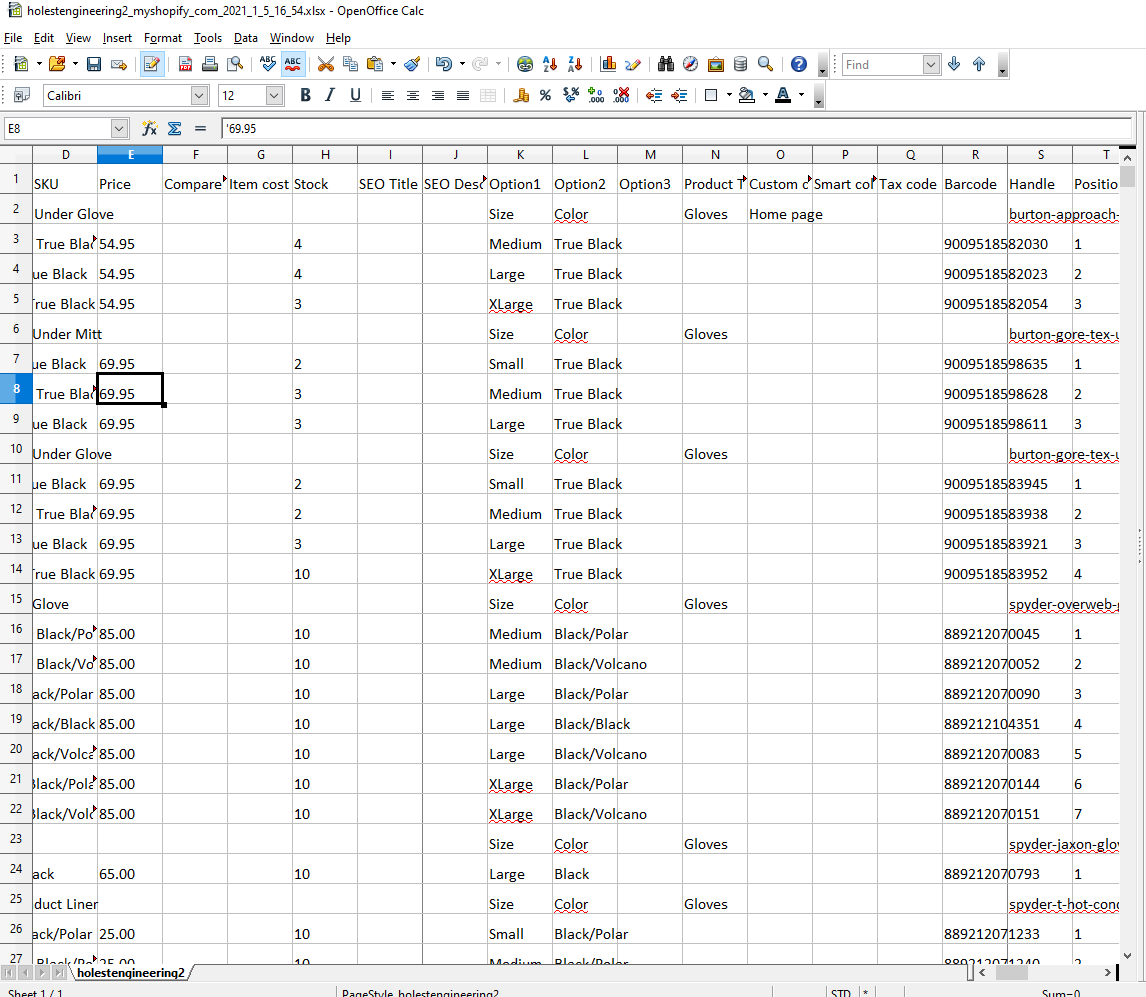
Ok so lets export. We click Export [NARRATOR clicks Export button] and in a matter of a few seconds we get our file. [NARRATOR opens exported file from PC program].
We see that all of our data is exported.
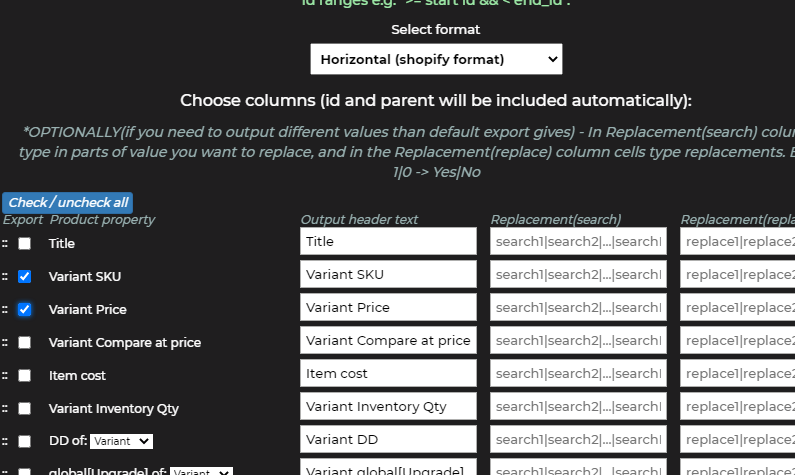
We can choose columns we want to export. For example common file formats for shops could be just SKU and Price CSV. Let's make such a file. I will choose the Horizontal format since SKUs and Prices exist only for variants [NARRATOR SELECTS the HORIZONTAL format] . I will now click “Check/Uncheck” to turn off all columns [NARRATOR clicks “Check/Uncheck” button in the export dialog to uncheck all] .
I will select just SKU and Price [NARRATOR selects variant sku and variant price. Now I export.
[NARRATOR clicks Export. NARRATOR opens the file from his PC program] .
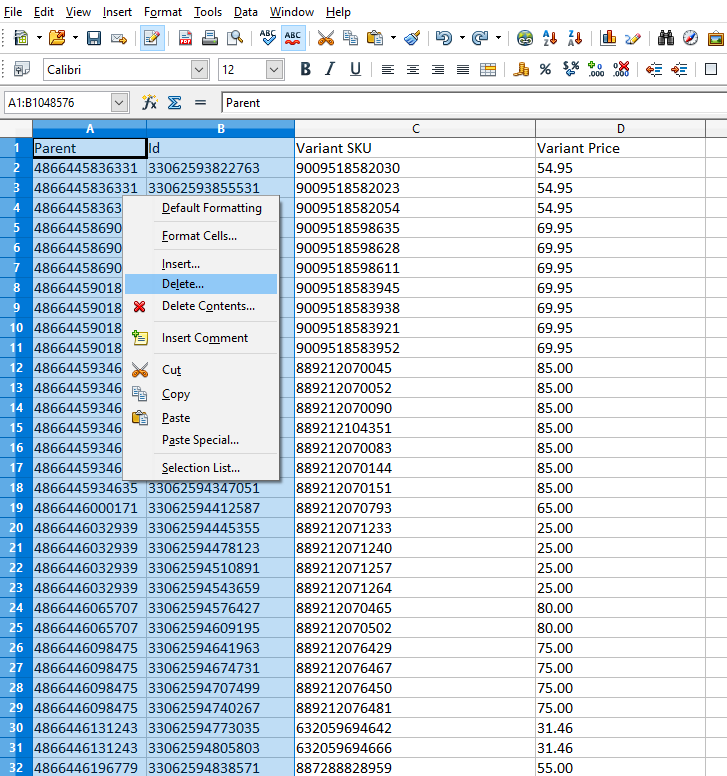
Here we see our data. We see app added id and parent id columns since this data ultimately identifiees products and variants. We can easily remove them if we want [NARRATOR removes id and Parent column from PC excel app] .
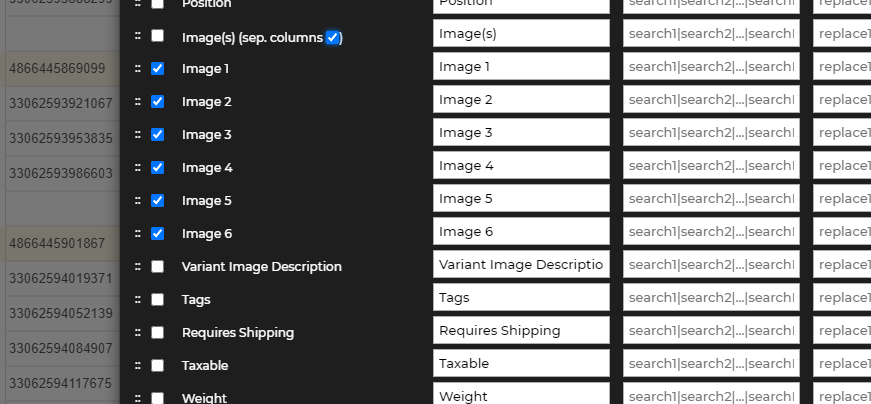
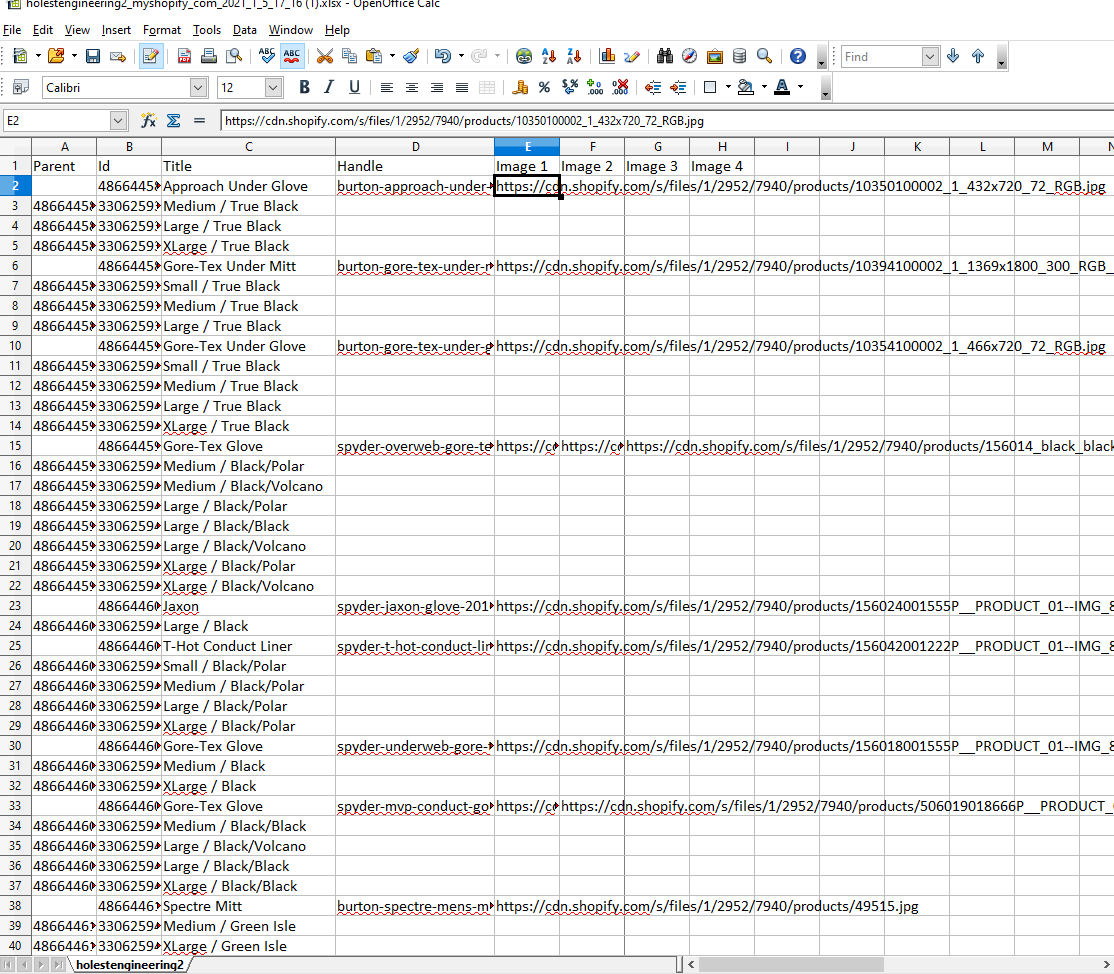
For images we can choose to export them all in a single cell or each in a separate column.
[NARRATOR clicks sep.columns checkbox] . App will offer us columns for which it can export all possible images. We can choose only to export like 4 of them. Let’s make one image export.
[NARRATOR Selects Vertical format. NARRATOR RE-ORDERS ITEMS OF EXPORT BY DRAGGING THEM TO BE LIKE ON NEXT IMAGE - title, handle, images ]
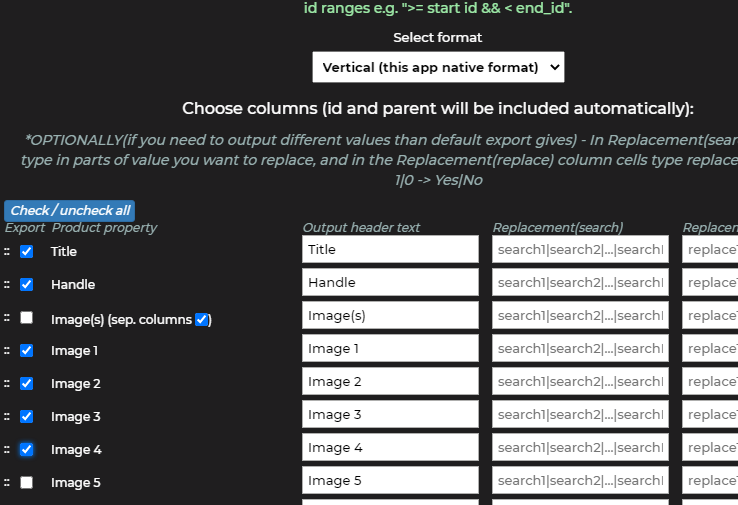
[NARRATOR Unchecks all. NARRATOR checks handle, title sep.columns for images then Image1 , image2, image3, image4. NARRATOR clicks Export. NARRATOR opens the exported file on his PC ] . So now I export, and we see the result.
That’s all for today. Thanks for watching this video!